 |
| Until Monday, this is what the ceiling in our LR looked like. . . |
I've been spending time in the ceramics studio lately, looking for some peacefulness while my house is somewhat mired in chaos and construction from a bathroom leak.
I don't do chaos well. Unless it's the creative kind. I love the smashing together of ideas and concepts to create something utterly new.
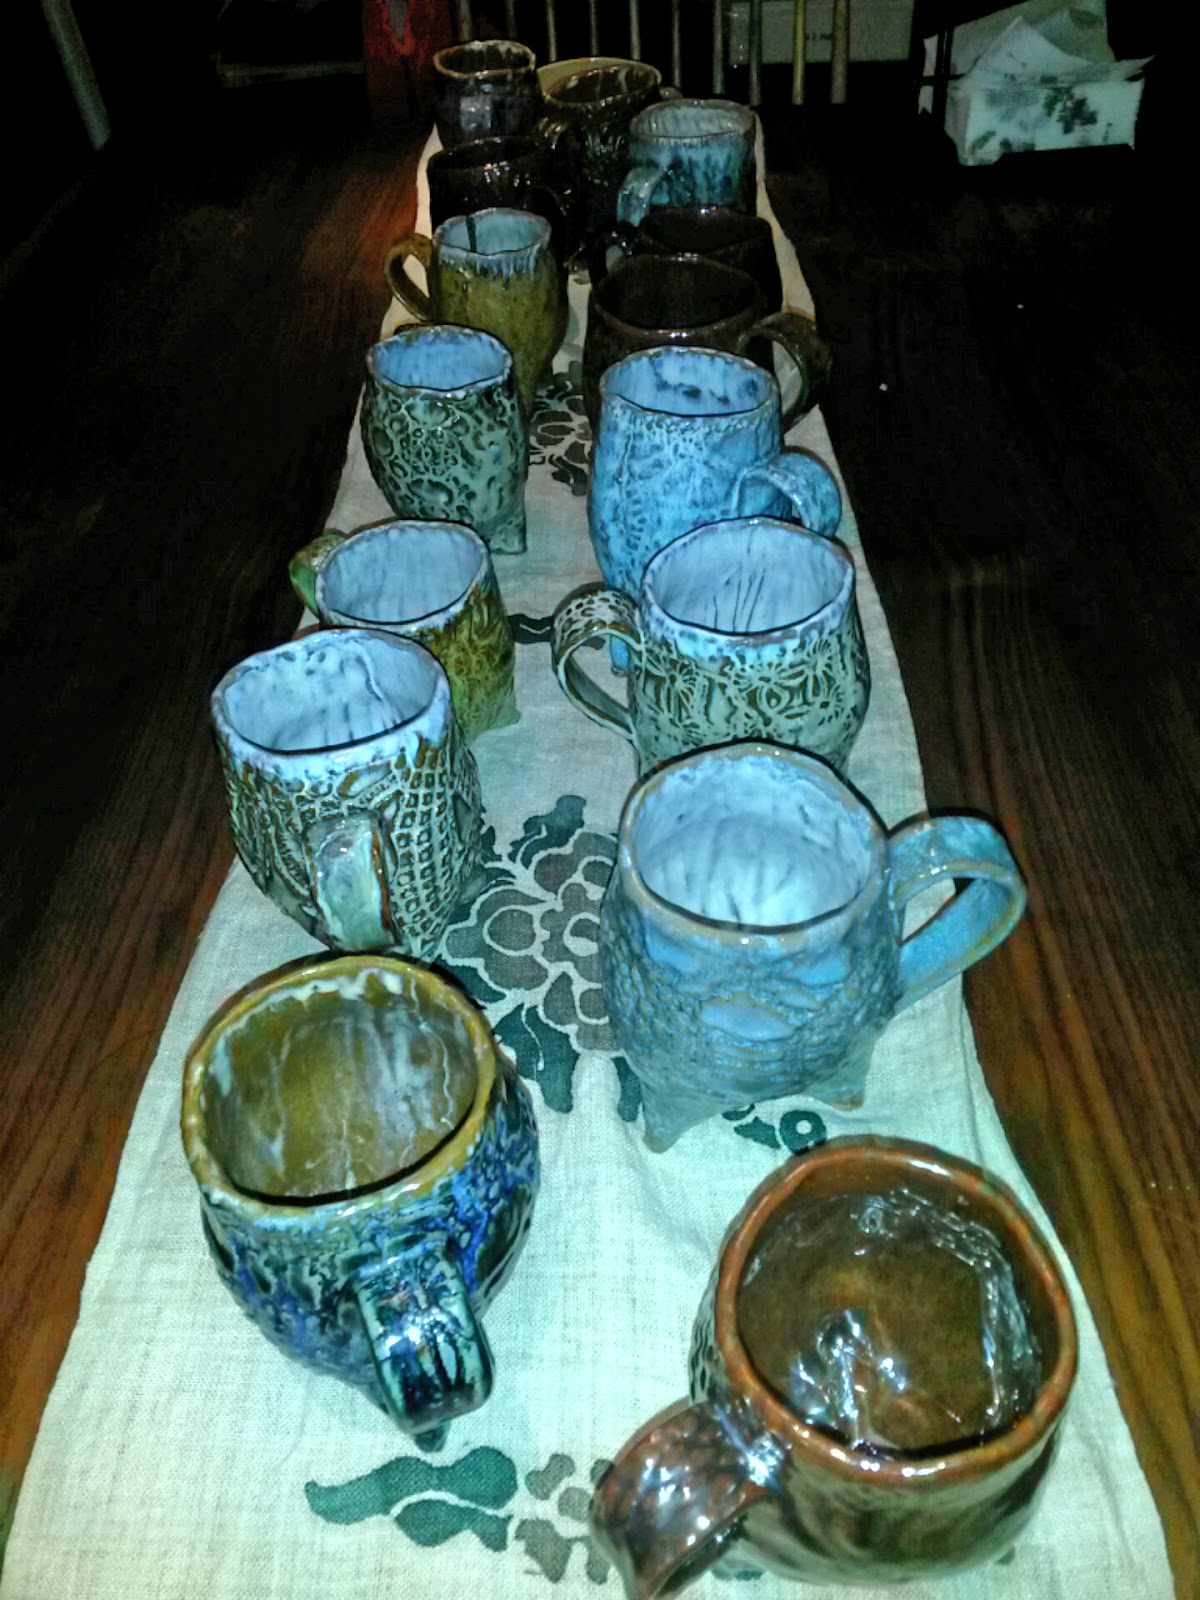
Home repair is definitely NOT that happy kind of chaos. So it's off to the studio, when I can. The past few weeks, I've been making what my writer/friend Bliss Morgan named 'Dragon Bellies' - handbuilt, textured cups with tripod feet and a distinctly 'waddling' shape.
Folks seem to like them. While I've seen other tripod/hand built work, they aren't Dragon Bellies! I have a lot of fun making these and I love they way they look all together, like they are a little army of marching creatures.
Folks also have asked me how I make them, so I though I'd do a process post.
Slab me, baby!

Dragon Bellies start out their lives as clay slabs, about 7" wide by 12" long. Because no two finished cups are alike, and I like the slight 'wonkiness' of their handbuilt natures, I don't fret over exact specs for the slabs. The studio has a wonderful piece of equipment - a dedicated slab roller - which definitely makes things easier, in terms of getting slabs with even thickness.
It's all about the texture

Yes, I know it looks like a spider web. It's actually lace. We have a lovely collection of fabrics with great textures. I go for a large variety. Part of the fun is taking a symmetrical design, like lace, and warping it in the process of shaping the clay so it looks more organic, like skin.
Roll it up

After the textured slabs have 'set up' a bit - which means they are stiff enough to hold a shape and their own weight when stood on end, but still soft enough to mold without cracking - I roll them into tubes and start sealing the seams.
You can make different kinds of seams, including invisible ones where you miter (bevel) the edges of each end and attach them 'face' to 'face'. But I like having seams that show for these cups and deliberately cut the seam line to be ragged.
To make clay that is not very wet seal well, you have to score the edges and coat with slip (a mix of clay and water.)
You can't march without feet


I use both hands to pinch the circle into a triangle form. (I needed one hand to take the photos!) Notice how the outside edge is scored. It's then painted with slip to help the adhesion. At this point, the 'feet' are usually too soft to hold the weight of the form, so I let them dry upside down for a while.
Push that belly out

Once they can be safely flipped on their feet, I start to use my fingers to gently push their bellies out and create a shape that is pleasing, but not symmetrical. The finishing work is what takes the most time. The inside seams from the tripod feet need to be sealed with snakes of clay and smoothed. To make the handles, I usually cut off the right amount from the top of the bellied-out cylinder, which gives me a handle of the same relative dryness that matches the pattern of the mug body. Sometime, I swap handles. Because I'm radical like that. Then the top of the mug needs to be smoothed. I use a damp chamois for that.
Then the dragon bellies need to dry to leather hard so they won't explode in the bisque kiln.
Color me!
Once the mugs emerge from their first trip in the kiln, they are at the bisque stage - fragile, but hardened clay. That's when the glazing begins. To pull out the texture, I paint the outsides with oxides, which then must be wiped off with a damp sponge, so that the oxide is only deep within the texture. It will react with the glaze in particular ways, depending on the oxide and the glaze, to create a subtle variance of the color within the grooves of the texture.
Then the mugs are dipped in one or two coats of glaze before being fired a second time.
When they emerge from the glaze kiln, they will be fully vitrified (converted to a glass like form), non-porous, and safe to use.
Unless they reach sentience and take your kitchen hostage.
Questions
How long does it take to make one of these?
Longer than I realize. LOL. I tend to make between 4 and 6 at a time and all told, the batch takes several hours of hands-on time (rolling slabs, rolling texture, making the cylinder, shaping the cup, finishing the cup, glazing), separated by days to weeks of waiting time. (Waiting for the slabs to dry, waiting for the cylinders to harden, waiting for the finished cups to dry, waiting for kiln time, waiting for the glaze to dry, waiting for the glaze kiln.)
What does it cost to make one of these?
Well, if I needed to make my living from ceramics and had to price these relative to my materials costs, kiln charges, studio fees, and my time, no one could afford to buy one and I would be making far simpler and easier to produce work. I price them in the $30 range, depending on size, which seems to me to be a reasonable price for a piece of functional art.
Do you take commissions?
Sort of? Occasionally? The problem with commissions, is it's often not possible to create the exact color or size specifications someone wants. Glaze is chemistry, and doesn't work like paint. E.g., you can't mix blue with yellow and expect to get green. The colors emerge as a chemical reaction triggered by heat and unless you know ALL the chemical properties of ALL the glazes, you will have no idea how something will turn out until you do a glaze test.
So, if you want a set of 4 dragon bellies, for example, and you're happy with the colors I choose, (I can usually promise color families, e.g., blues or greens or neutrals) then sure, pop me a message.
The other problem with commissions, is that because my day to day work is as a writer, and I don't have the time to be a full production potter, it may be weeks or longer before I can promise finished work.
Is this all you make? Don't you get bored?
No. and No. :) I also throw on the wheel, to make smooth, symmetrical forms including bowls from small prep size to large serving size, and cups/mugs. And bored? Playing with clay is my kinesthetic therapy. It's soothing and I end up with something that someone will use and enjoy in their day to day life. How cool is that? And having a passion that takes me out of my thinking brain is also good for my writing process.
I'm an artist too. Do you want to do a trade?
Hell yeah! That's one of my favorite things to do. I've traded for paintings, jewelry, blown glass, knitted work, wood work, and even cookies!
You can see more photos of my work on my ceramics site: http://www.dragonbellyceramics.com And wish me luck - I've applied for a spot in the juried art show at World Fantasy!
Any other questions about my ceramics work? AMA in the comments!

A juried show! Wow!
ReplyDeleteI took a pottery class once and I understand how theraputic it is. It also requires space and access to certain equipment.
I love the bellies! They're so awesome!
so awesome
ReplyDeletethiet ke nha dep
nha xinh